

How To Use A Tagging Gun With J Hooks, Youtube
This DIY Rolling Cricut Craft Cart is sponsored by Kreg Tool. All opinions are 100% mine.
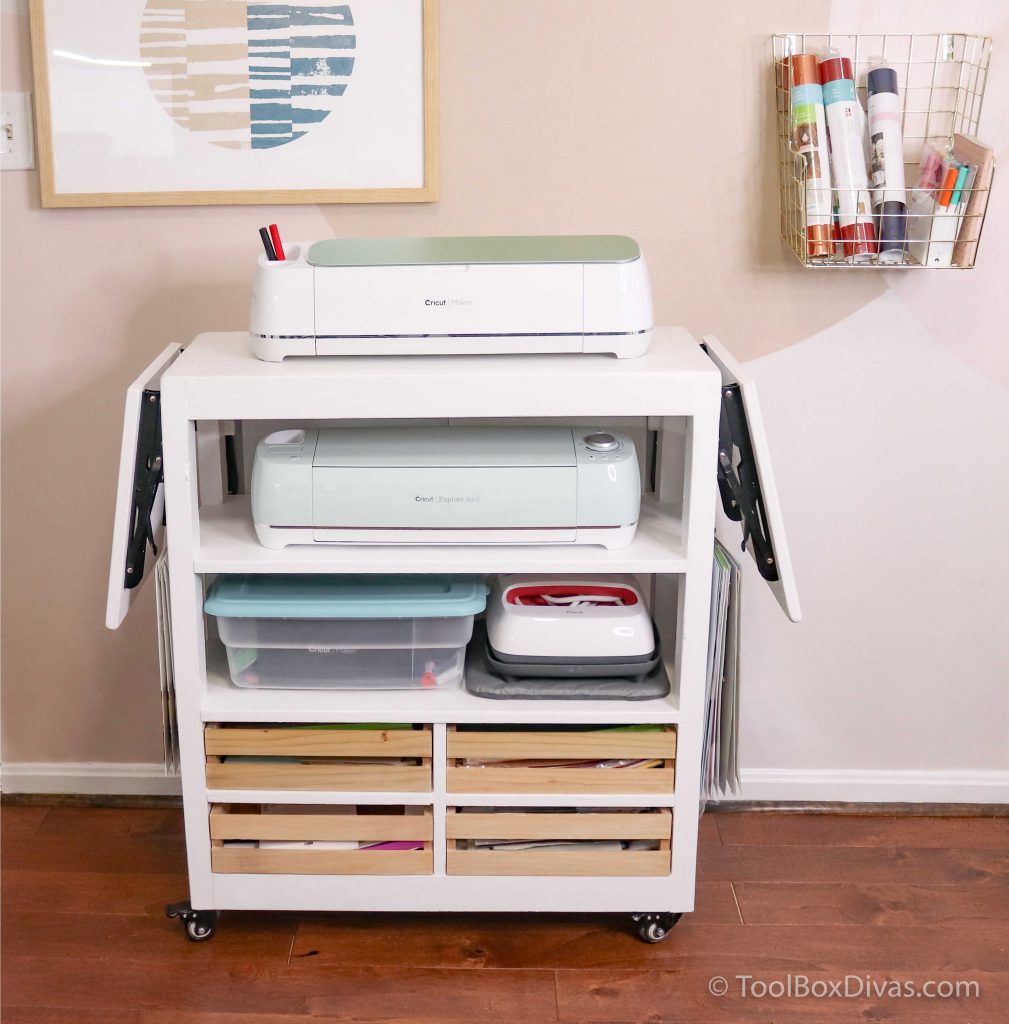
I was badly in need of a dedicated spot to store and organize my Cricut and craft supplies. The options I institute online were flimsy and expensive. Likewise, it didn't fit exactly what I needed. So I designed this mobile arts and crafts cart to fit all my craft storage needs. It can exist built with limited tools with the assistance of a Kreg Rip-Cut™ and a Kreg Pocket-Pigsty Jig®.
GET THE PLANS
Materials
- 3 – Lumber 2in. Ten 3in. Ten 8ft
- ane – 48″ 10 96 Sheet of three/iv″ Plywood
- six – Folding Shelf Brackets 12″
- 4 – ii″ swivel caster
- #eight Woodscrew 1 1/4″
- 40 #8 FH Woodscrew for Pocket Holes 2″
- #viii Woodscrew ane-1/two″
- Woods Glue
Tools
- Miter Saw
- Circular Saw
- Affect Driver
- Tape Measure
- Speed Square
- Level
- Clamps
- Jigsaw
- Brad Nailer (optional)
- Planer (optional)
- Router (optional)
Kreg Tools
- Kreg Pocket-Hole Jig® K5 – My get-to joinery in woodworking is pocket holes. Information technology's quick, easy, and secure. Using pocket holes brand building some of the almost complex builds possible. And the Kreg Pocket-Hole Jig® K5 is what I utilise.
- Kreg Rip-Cut™ – It makes it possible for me to cut down large sheets of plywood without the demand for a table saw. It'due south corking on the go and in a small workshop. As well, I tin can easily make repetitive cuts without having to remeasure everything out. Kreg Rip-Cut™, along with the K5, is one of the most utilized tools in my workshop.
Watch The Video!
OK, Let'due south Get Dirty!
The frame of the craft cart.
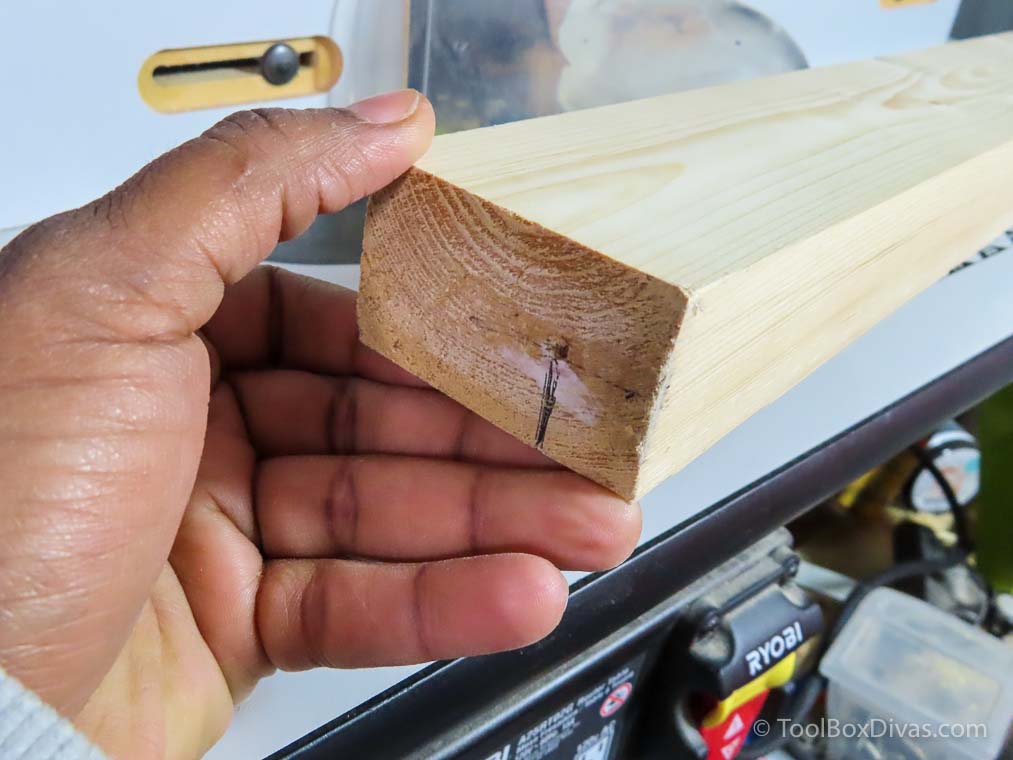
Step 1. I start by cutting the 2×three lumber for the frame of the craft cart down to size.

Then I take it over to the planer to clean up the boards. Planing the 2x3s is completely optional. I practise this because 2×3 lumber is notorious for being all out of shape. But it's super cheap and sturdy.

Step 2. Using the Kreg Pocket-Hole Jig® K5 create pocket holes in the 2×3 to secure the pieces of the frame of the craft cart.


Step 3. Assemble the 2 sides of the frame. Clench the pieces together to make screwing the pocket holes in place easier. I recommend using a speed square to ensure everything is foursquare.


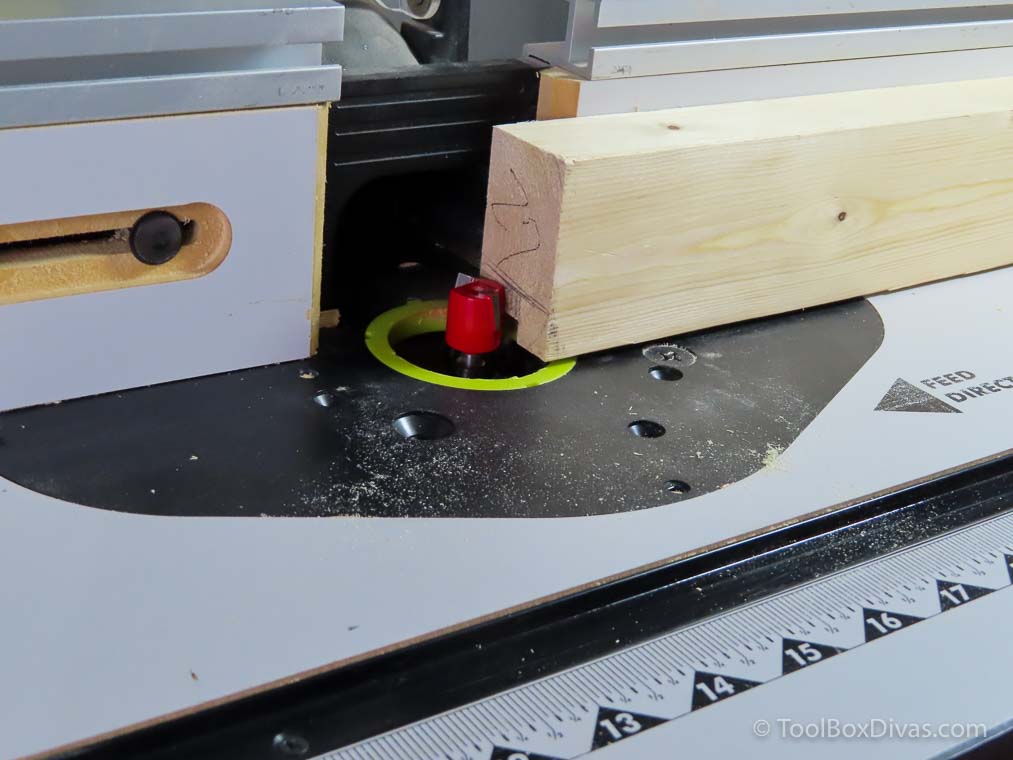
Pace 4. Using a router and a 3/4in straight bit route downward 3/4″ deep and 1/ii″ over in the interior side of the two×iii top and lesser back and front end rails. This is optional so that the bottom and tiptop shelf sit affluent in the frame. But you do non accept to exercise this footstep. The top and bottom shelves tin can sit on top of the frame. If you exercise use a router opt for a router with a router tabular array for better command and stability over the cutting.
Step 5. Attach the front and back height and bottom rails connecting the ii side frames of the arts and crafts cart.


The shelves of the craft cart.
Step 6. Using the Kreg Rip-Cutting™ and a round saw cut downwardly the plywood to size length-wise.


Smaller cantankerous cuts can be made using a miter saw.

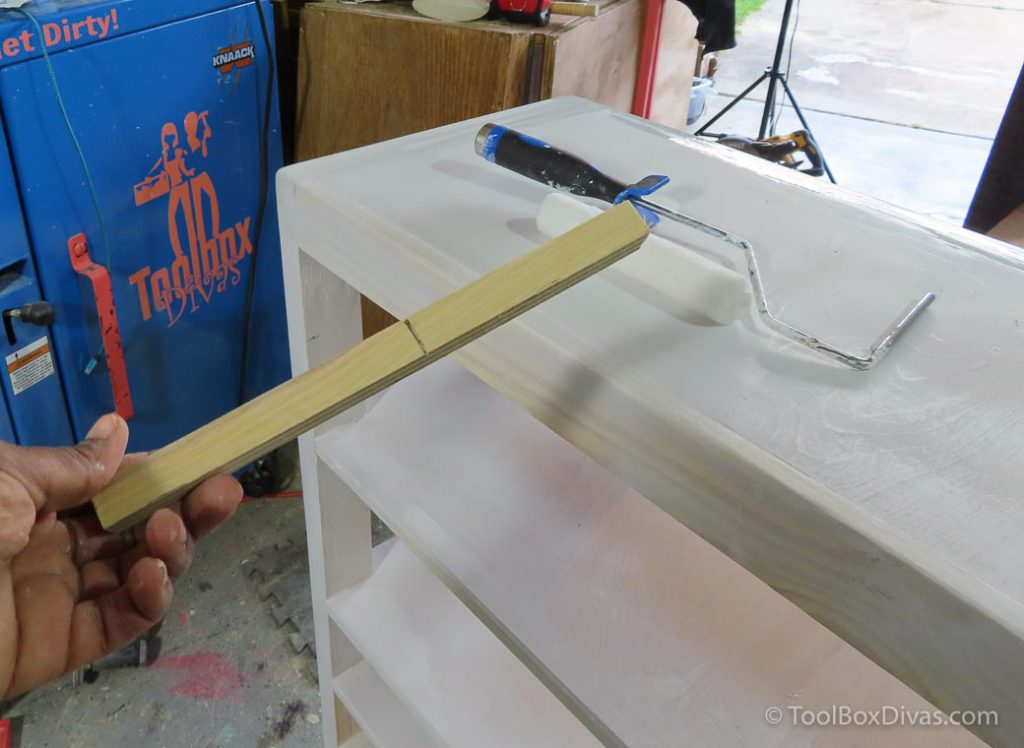
Step vii. Secure the top and bottom shelf with wood mucilage and screws or a brad nailer.


Footstep 8: Identify pocket holes in the eye divider board and spiral information technology in place thirteen ane/8 " abroad from the edge in the center of the bottom shelf.

I plant a speed foursquare especially helpful at this function to ensure everything was square every bit I screwed it in identify.

Step 9. Next spiral in place two smaller bottom shelves. I found that it was a lot easier cutting 4 fleck pieces of 2×iii to 4 9/16 in. to get the correct summit to spiral the boards in identify.


Step x. Then using a jigsaw I cut the corners of the 2nd shelf and screwed it in place.


Step eleven. Secure the side console to the sides of the arts and crafts cart.

Step 12. Spiral the caster wheels in place. It helps to add an additional scrap piece to the bottom so that you'll accept 4 corners to screw the caster into.

Step 13. Adhere a slice of scrap wood to the inner corners of the back of the cart. This is where you will attach the folding shelf brackets.

Footstep 14. Adhere the shelf subclass for the back and side folding panels.

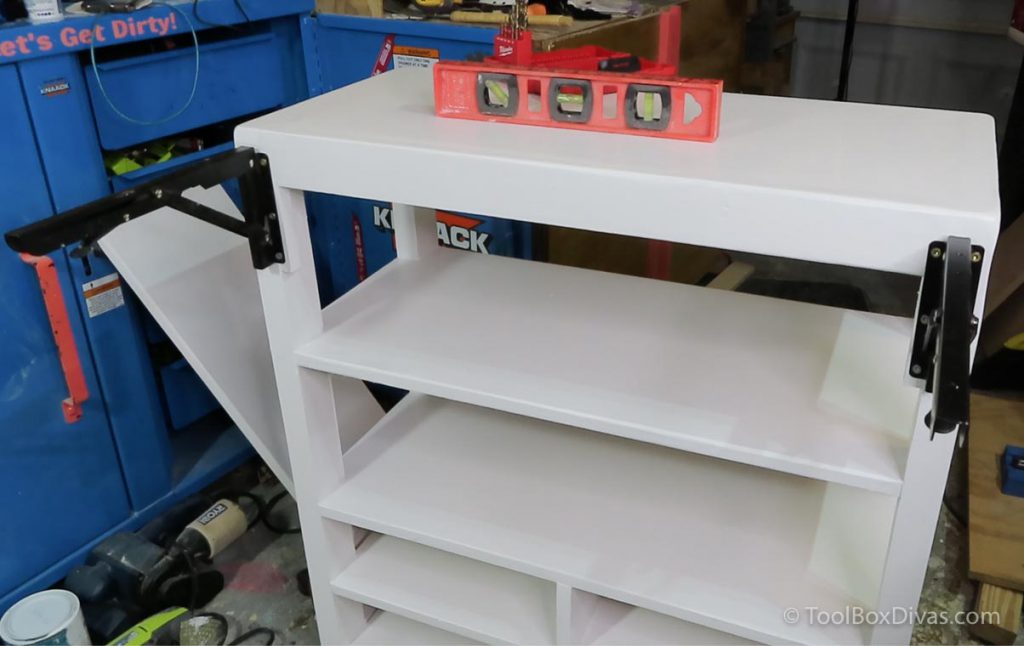
And so secure the panels to the brackets. Ensure that the panels are level with the arts and crafts cart when unfolded.

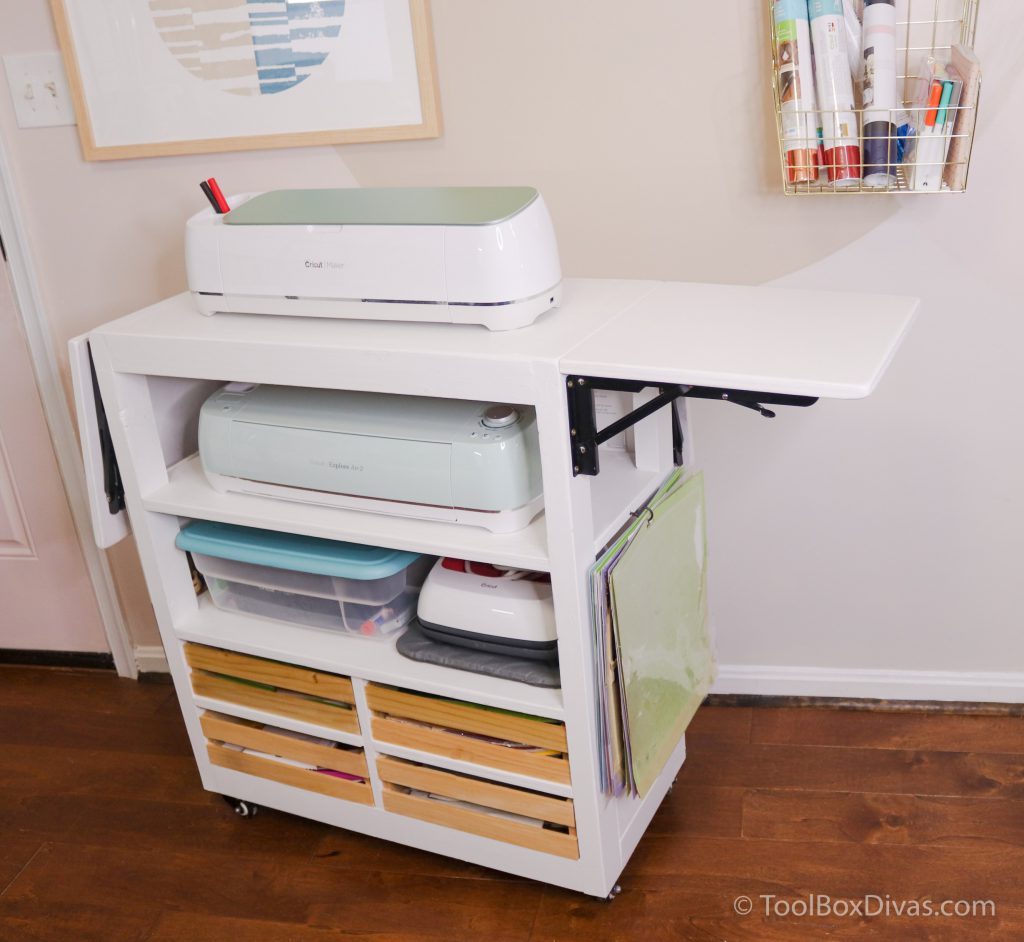
Now store your Cricut and all your Cricut supplies.
I added these custom crates to the front because my supplies just hanging out looked kind of ugly and untidy. You can do the same or observe baskets that work within the space.


I absolutely love how this instantly provided some order to the chaos of my craft supplies. I added some J-hooks to the sides and back under the folding panel to hang my Cricut mats and veneer sheets. The back I'g able to hang the long 12x 24 Cricut mats.


Get THE PLANS
For more than projects, you tin can create using the Kreg Rip-Cut™ and a Kreg Pocket-Hole Jig® check out How to Make a Mod Shoe Cabinet and this Desk and Bench Gear up w/Toy Box Storage.
Source: https://toolboxdivas.com/how-to-make-a-diy-rolling-cricut-craft-cart/
Posted by: browncorgentor.blogspot.com
0 Response to "How To Use A Tagging Gun With J Hooks, Youtube"
Post a Comment